Tutorials
Getting Started with Google Tag Manager
Google Tag Assistant is a fantastic tool which allows businesses to spend their advertising dollars wisely. While the process is quite similar for any platform, this SOP will highlight the needed steps to add the Tag Assistant to a WordPress-based website.
1. Download the free Google Chrome extension from here: https://get.google.com/tagassistant/. Then, add it to a Chromium-based browser such as Google Chrome or Microsoft Edge.
2. Sign up for Google's Tag Manager here: https://marketingplatform.google.com/about/tag-manager/. You can sign up using an existing Google account, or you can create a new account from scratch.
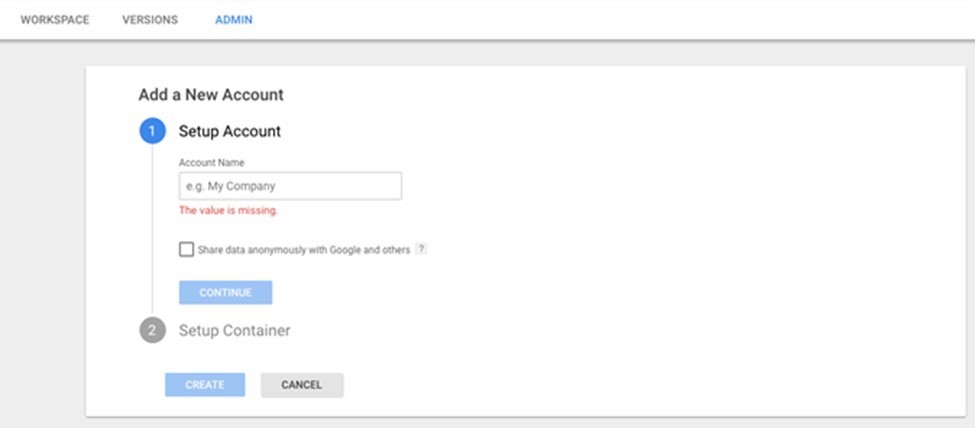
3. Set up the account name and container. Feel free to use the same name for both fields (your company's name, for example).
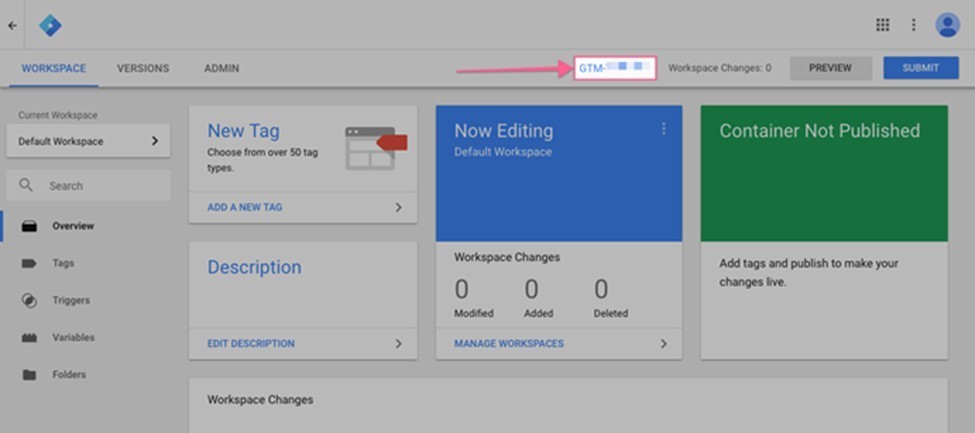
4. Accept Google's terms to move on, and you will see the default workspace. Notice your Google Tag Assistant ID.
5. Your container isn't published yet, so let's do that now. Click "Submit", and then "Publish" to get the job done.
6. It's time to install a Google Tag Manager WordPress plug-in. Log into your site, and then select "Plugins" -> "Add New" from the sidebar menu. Search for "Google Tag Manager for WordPress ", and then install the plugin; the image on its page should look like the one below.
7. Activate the plugin.
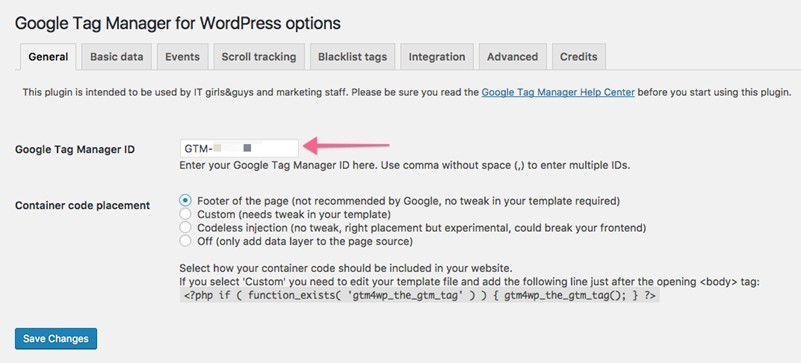
8. Click "Settings" in WordPress' sidebar, and then choose "Google Tag Manager". Paste the Google Tag Manager ID you have gotten from the 4th step into the appropriate field, as shown below.
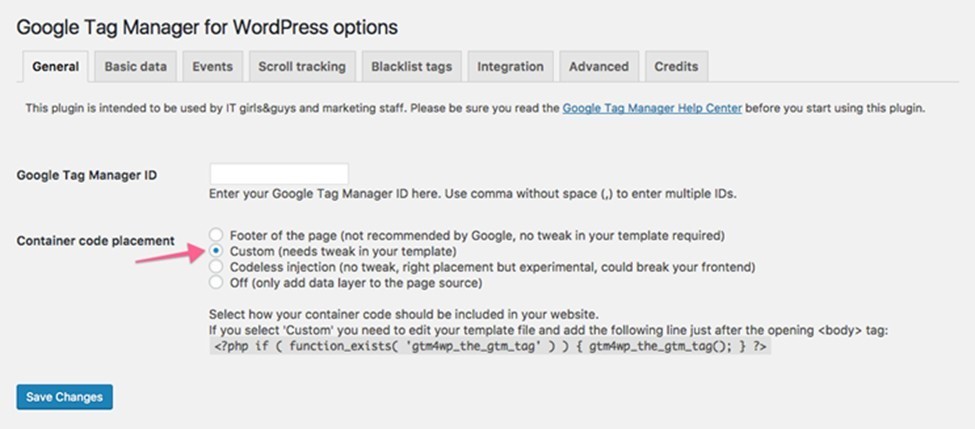
9. Choose the "Custom (needs tweak in your template)" option.
10. Copy the code at the bottom of the screen, and then click the blue "Save Changes" button.
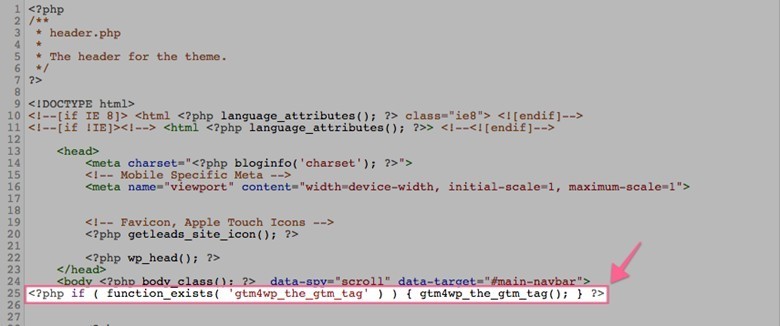
11. From WordPress' sidebar, choose "Appearance" -> "Editor". We will edit the theme, adding the code above to the "body" section of our pages. Paste the copied line of code below the opening "body" tag, as shown in the following image.
12. Click "Update File" to finish the tag setup. Please note that you will have to do this again if you decide to change or update your template in the future.
Some WordPress themes have dedicated fields which will allow you to plug in the code once, and then keep it running even after theme updates. However, if your WordPress theme lacks this facility, you can use a third-party plugin such as Tag Manager – Header, Body And Footer, which will do the job.
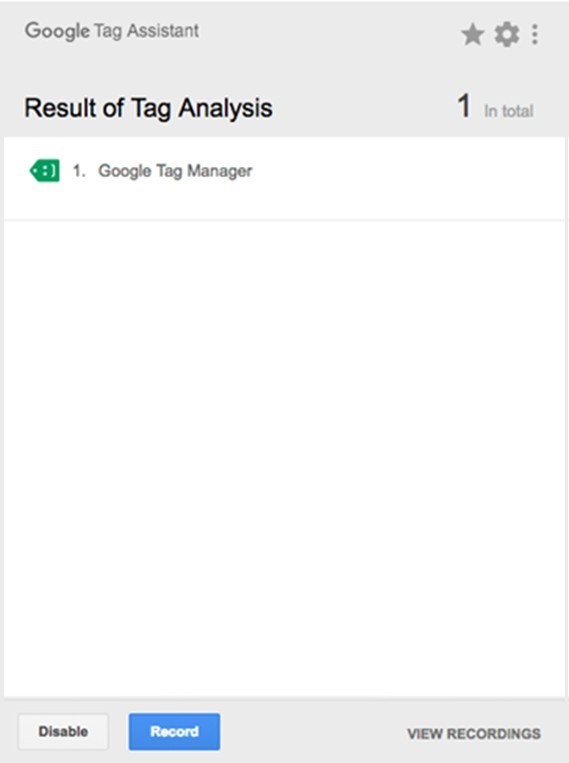
13. It's time to verify if everything works fine. Open your website using the Chromium-based browser, and then click the appropriate Chrome extension icon. Click the blue "Enable" button at the bottom.
14. Click the "Refresh" browser button to reload your website, and then click the extension icon again. If everything went okay, you will see a green tag just like the one below.