Tutorials
Back Up and Restore Your WordPress Site
Companies need effective backup solutions more than ever before. According to https://purplesec.us/, businesses fall victims to ransomware attacks every 14 seconds. More than this, lots of websites can go offline for a great variety of reasons. Theme upgrades, faulty plugins, and compromised servers are just of few of the factors that can affect your website's functionality for many hours, and sometimes even days.
So, how can you recover your WordPress site when disaster strikes? Let's find out!
1. Begin by installing the UpdraftPlus plugin.
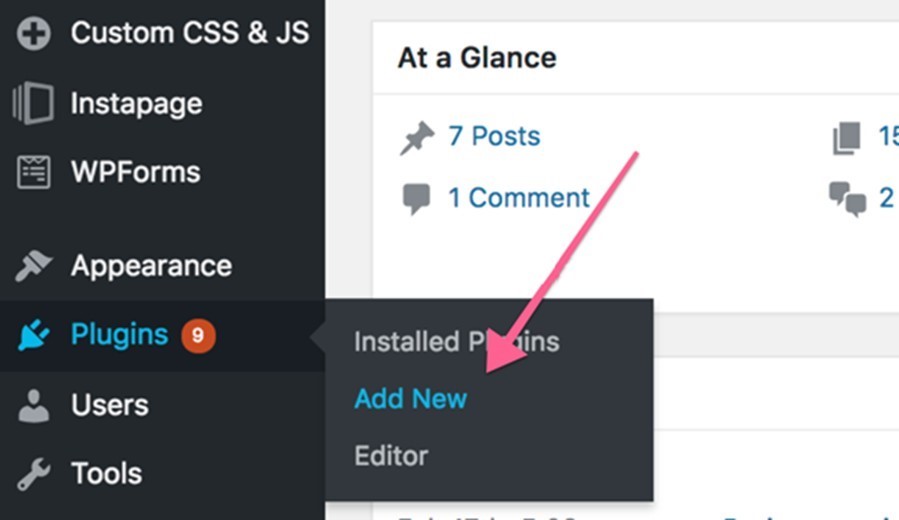
2. Log into the WordPress dashboard and then choose "Plugins" -> "Add New".
3. Search for "UpdraftPlus WordPress Backup Plugin", install it, and then activate it.
4. It is time to configure the plugin settings.
a. Choose the backup schedule. How often would you like to back up the site? If you post fresh content on a monthly basis, for example, choose to back up your site every month. However, if you update the site every single day, you will want to back it up on a daily basis. Don't forget that daily backups can eat a lot of space, though, especially if your business site makes heavy use of multimedia resources. The good news is that UpdraftPlus will allow you to keep a specified number of backups, reducing the amount of needed server space, and thus helping you save money on expensive cloud hosting.
b. Choose the number of retained backups. We recommend keeping at least three different backup copies, because a simple WordPress theme or plugin update may break the site.
c. Choose the number of database backups. The database file has a small size, and it is used to store the most important website settings. So choose to back it up daily, and keep at least ten copies.
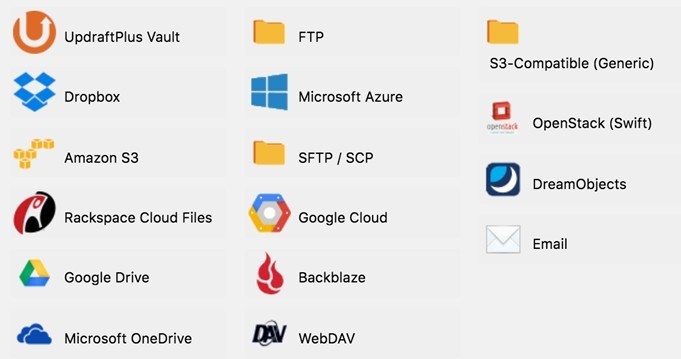
d. Choose the cloud storage destination. It is wise to avoid storing the backups on the same server with your site; otherwise, if hackers get access to the server, they will be able to delete both your website and its backups.
We recommend using Dropbox, Microsoft Azure, Amazon S3, Microsoft OneDrive, Google Cloud, or Google Drive. We will use Google Drive in this example, because it offers up to 15 GB of free space for anyone.
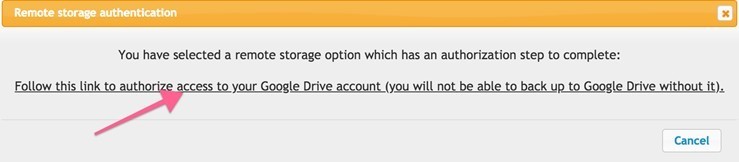
To get started, you will need to give the plugin access to your Google Drive account.
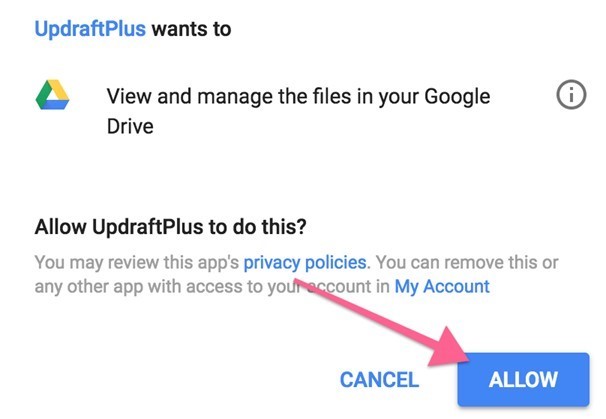
5. Click the link that looks like the one in the picture above, and then log into the Google account. Allow the plugin to view and manage files in your Drive.
If everything works as expected, the current window will close, and you will return to WordPress. Click the "Complete setup" button, and you should see a "Success" message.
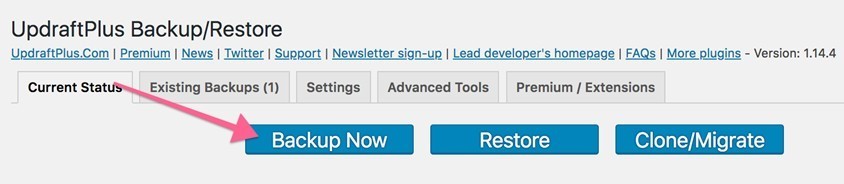
6. Let's back up the website manually. Click "Settings" -> "UpdraftPlus Backups" on the sidebar menu, and then choose "Backup Now".
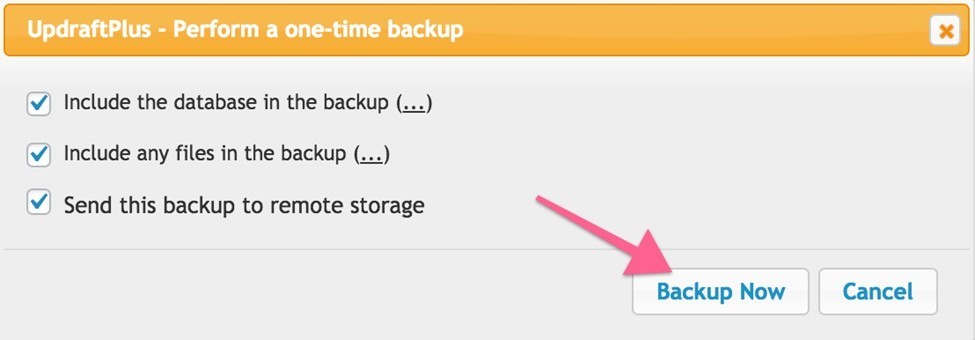
7. Choose what you want to back up: the database, the website files, or both (our recommendation). Check "Send this backup to remote storage" to save the data to your Google Drive, and then click the "Backup Now" button.
Most websites will be backed up within minutes; the progress bar indicator will help you determine how much time is needed. You can close the browser window if you want to, because the data will be backed up on the server, and not on your computer.
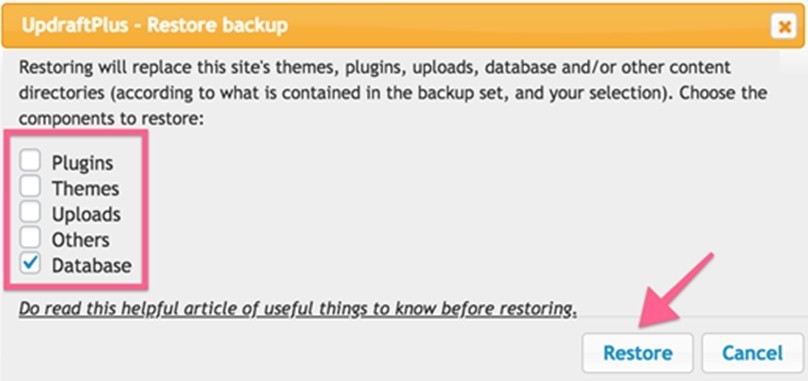
8. To restore your site, choose the desired backup set, and then click the "Restore" button at its right side.
9. Choose what you want to restore: plugins, themes, uploads, other files, or just the database. Then, click the "Restore" button.
UpdraftPlus will start to download the previously saved data from the cloud. Wait until you see a "Restore successful!" message; when it shows up, your WordPress site will be operational once again.