Tutorials
Setting up Google Search Console
Google's Search Console is a free tool which helps businesses monitor the performance of their websites in the world's most popular search engine. This tutorial will help you connect the Search Console to Yoast, an SEO plugin, giving you the option to get website traffic notifications and stats straight into your company's WordPress dashboard.
1. Begin by installing the Google Tag Manager on your website. Check out the "Getting Started with Google Tag Manager" SOP on our website if you haven't done that yet.
2. Add the Yoast SEO plugin. Log into the WordPress admin dashboard, choose "Plugins" -> "Add New", and then search for "Yoast SEO". Here's how the image on its page should look like.
Install the plugin, and then activate it.
3. Create a Google Search Console account here: https://search.google.com/search-console/welcome. Use an existing Google account to log in, or create one from scratch.
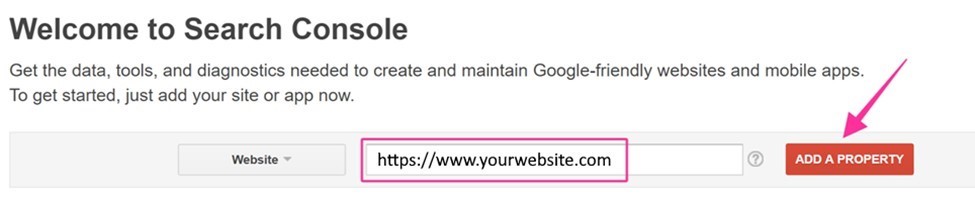
4. It's time to "Add a Property". Choose "Website", type in its URL, and then click the red "Add a Property" button on the right side.
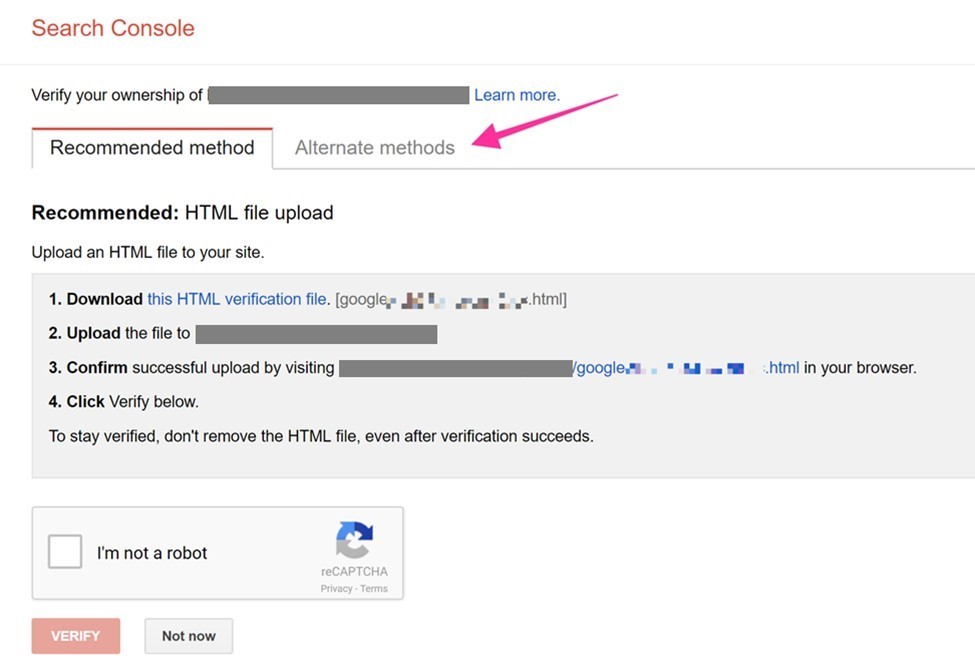
5. It's time to confirm that you are the owner of that website. Google allows us to verify site ownership through several methods. You can download an HTML file from the Console, and then upload it to the root of your website using an FTP client, for example. However, we will use a much faster method, which makes use of Google's own Tag Manager.
To get started, select the "Alternate methods" tab.
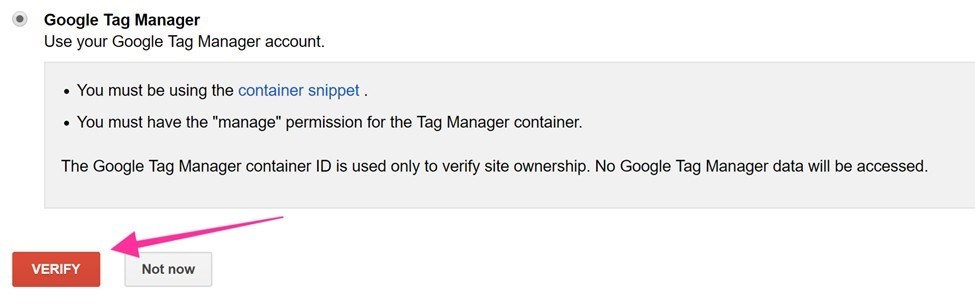
6. Choose "Google Tag Manager", and then click the red "Verify" button.
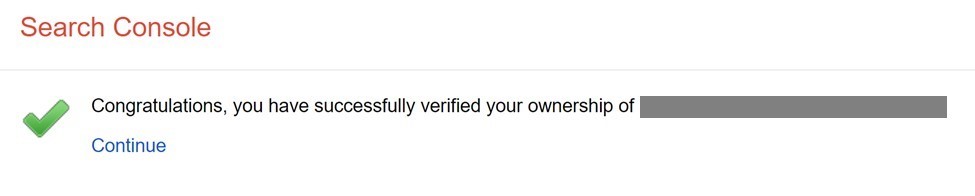
7. That is all! The Console will confirm that you own the registered website, and a click on the "Continue" link will take you back to the Search Console dashboard.
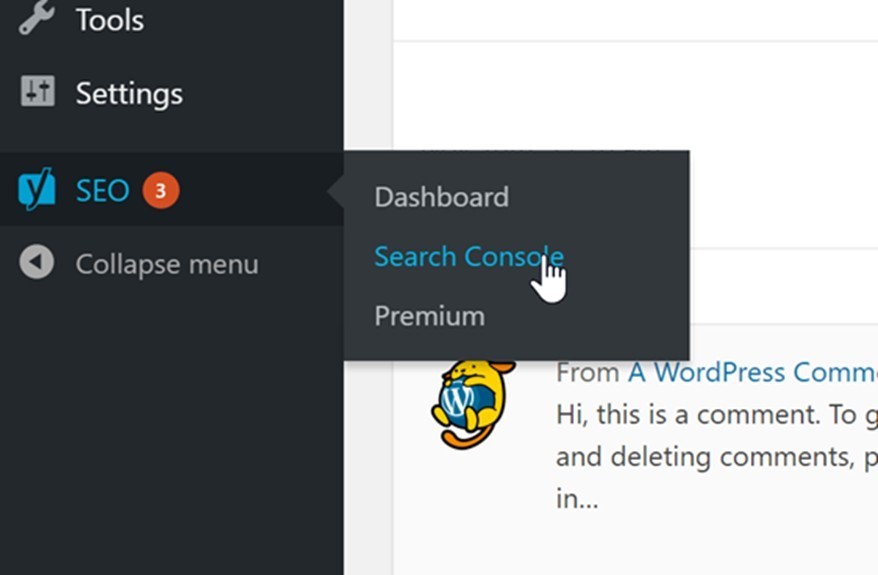
8. Let's connect the Search Console to Yoast SEO. Log into your WordPress-based website, and then choose "SEO" -> "Search Console" from the sidebar.
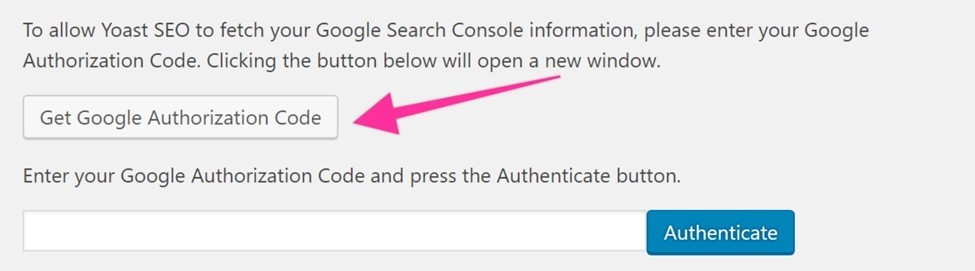
9. To connect the Console to the plugin, we will need to get an authorization code.
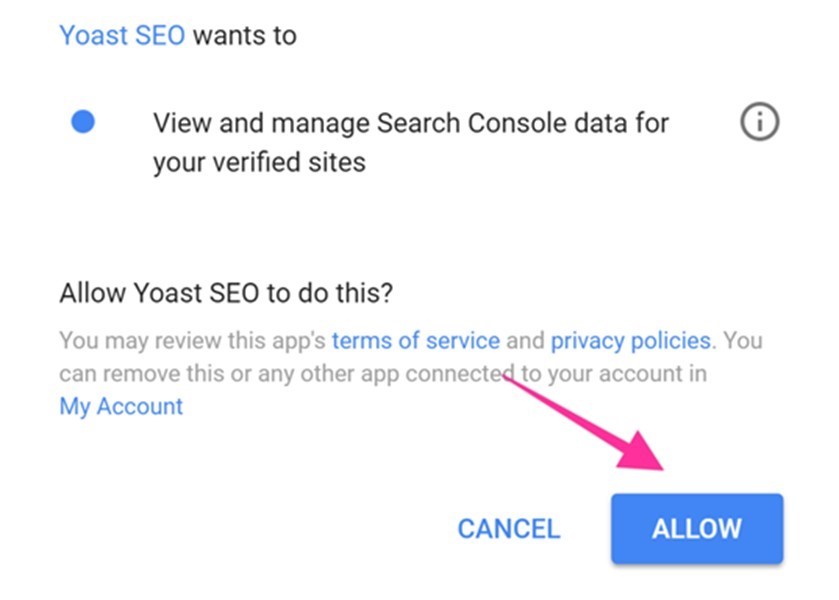
Select the Google account you've used for the Console, and then allow Yoast SEO to view and manage Search Console data for your verified sites.
10. You will get a unique code that must be copied, and then pasted in the plugin's configuration. Then, click the big blue "Authenticate" button.
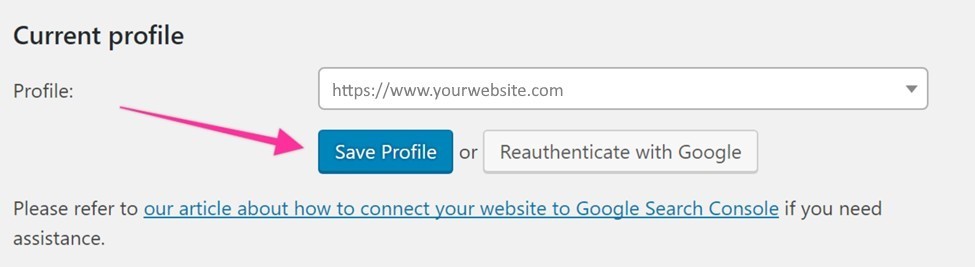
11. If everything works as expected, you will now have access to Search Console data from within Yoast SEO. Choose the proper website if you've got more than a web property, and then click "Save Profile".
That is all! From now on, you will be able to evaluate performance and determine any website-related issue from within the WordPress dashboard.